Sanding wood is a critical step in any woodworking and finishing process for a number of important reasons. For new and more experienced woodworkers, this cannot be overstated. In many cases, sanding can make the difference between perfect and sub-par results. In this article, we will take a look at actionable wood sanding tips that can take your projects to the next level.
Ten Reasons Why Wood Sanding Is An Important Step In The Woodworking And Finishing Process:
1/ Removing Defects And Imperfections In The Wood:
If there are dents, scratches, and other blemishes in the wood they can be removed with sanding. This includes marks that may be left behind by previous processing and tool marks.
2/ Deburring Rough Edges On The Piece Of Wood:
Sharp edged can be rounded and chamfered with sanding to make them smooth to the touch and reduce splinters.
3/ Preventing From Getting A Splinter From The Wood:
During cutting and drilling in both softwoods and hardwoods with coarse grain patterns splintering can occur. Sanding the surface can reduce the risk or be used to smooth the surface later.
4/ Sanding Leaves You A Smooth Surface:
Sanding removes any obvious imperfections, including bumps, unevenness, rough spots, and more. The surface is smoother for further finishing and processing which will give the final piece a more polished appearance.
5/ Enhancing The Grain Of The Wood:
During sanding the natural beauty of the wood is revealed as the wood grain becomes more prominent and this will improve the final finish.
6/ Proper Joinery:
If you’re working with finger or mortise and tenon joints or dovetails they will fit more snugly if the surfaces are properly sanded.
7/ Preparing The Wood For Various Finishes:
The applications of finishes, such as stain, paint, or varnish is much smoother when the surfaces are sanded. The surface will be uniform and professional which will enhance the aesthetic appeal.
8/ Ensuring A Precise Fit When Joining Wood Pieces Together:
Woodworking projects that have multiple components, such as drawers, doors, cabinetry, and more should fit together better after sanding. There will be no gaps or binding that can prevent the various pieces from fitting together snugly.
9/ Texture Customization The Woods Finished Look:
Sanding can be used to change the wood texture to create a different look. Using fine-grit sandpaper will make the surface smoother and coarser grits can create a rustic or textured look.
10/ Restoration And Refinishing Older Pieces:
During these processes, sanding is often required to remove old finish layers and create a smooth surface for a fresh finish.
Basic Tools And Materials You Will Need For Sanding:
One of the most underestimated wood sanding tips is to gather the materials and tools that you need before you get started. These can be broadly classified into six key areas, they are tools, clamps, materials, dust collection, optional extras, and paints and finishes.
1. Tools Required For Sanding Wood

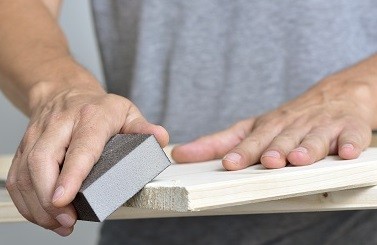
These can be further divided into hand and power tools and they can both be useful in certain applications. Hand tools include sandpaper in various grits, a sanding block, and sanding sponges which are especially useful for sanding contours.
When it comes to power sanders, the choices are lightweight palm sanders, detail sanders for corners, a belt sander for heavy material removal, an orbital sander for general sanding, and a random orbital sander which reduces swirl marks with random sanding patterns.
2. Clamps To Hold The Wood In Place
The work-piece must be stationary and not moving to improve sanding performance and safety when working. There are a wide variety of clamps on the market and the ones you choose will be determined by the size of the piece, the workbench, and other factors.
Over time, woodworkers tend to amass a large number of clamps in various sizes to work on different projects.
3. Materials Needed When Sanding Wood
- Of course, you will need the wood that you want to sand, backing pads for power sanders, and a sanding block if you intend to sand by hand.
- A tack cloth will be useful to remove dust and debris to get a cleaner surface for the application of finishes.
- Safety goggles or glasses should be worn to protect the eyes against flying dust and debris.
- A mask or respirator is needed to prevent the inhalation of fine dust particles.
- The sandpaper is graded in grits, including 60, 80, 100, 120, 150, 180, 220, and even higher. The high numbers are finer grits, they are used for smoothing and finishing, the low numbers are coarser and they are used for material removal (more on this later).
4. Dust Collection When Sanding Wood
The accumulation of fine sanding dust and debris from sanding is a potential health hazard. There are two reliable ways to remove sanding dust to make the workshop tidier and healthier.
The first option is a shop vacuum that can be connected to power sanders to keep the sanding dust in one location.
The second option is a powerful dust extractor system that can be installed in a dedicated woodworking shop.
5. Optional Extras For Sanding Wood
Many woodworkers have their own preferences when it comes to sanding. They may use specialized contour sanding grips, their favorite sanding gloves, and special abrasives.
The needs of the project, how the woodworker approaches it, and how they prefer to work are all important considerations.
As you learn more about woodworking you will develop your own style and choose the tools that match your preferences.
6. Paints And Finishes For Your Woodwork Project
If you’re planning to paint or finish the wood when you’re done with sanding, you need to have those materials on hand.
Research the best finish for the specific pieces and look at the products that best match those needs.
You will need to have the stains, paints, varnishes, and other finishes ready to go when you need them.
Choosing The Right Sandpaper For Sanding Wood:
There are many wood sanding tips to a high standard, but the most important is the sandpaper grit selection.
Selecting the appropriate sandpaper depends on various factors, including the specific sanding job, the type of wood, the surface condition, and more.
When you carefully assess the purpose of your sanding task, choosing the right sandpaper grit becomes a much simpler decision:
Coarse (40-60) Sandpaper Grits:
These are ideal for removing heavy surface imperfections, old paint, patches of varnish, and more. A very coarse grit sandpaper can be used for the initial shaping and smoothing of very rough surfaces.
Medium (80-120) Sandpaper Grits:
This grit range is used for general sanding and refining after the coarse sanding stage is complete. The scratches caused by coarse sandpaper grits are removed and the surface is further prepared for finishing.
Fine (150-220) Sandpaper Grits:
These sandpaper grits are ideal for final smoothing and surface preparation. Any fine scratches are removed, the surface is evened out and the wood is ready-to-finish.
Extra Fine (240 or higher) Sandpaper Grits:
This sandpaper grit range is used for polishing and very fine finishing. Extra fine grit sandpaper is often used to sand between finishing coats to create a smooth and glass-like professional finish.
What To Consider When Choosing Which Sandpaper To Use
During sanding it’s important to consider the grain direction and the wood type. Softwoods tend to have open grain patterns, starting with a coarser grit that can level the surface before graduating to finer grits.
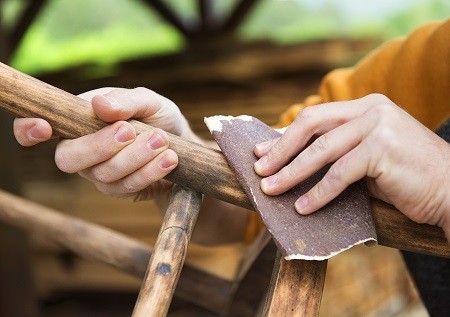
Hardwoods have tighter grain patterns, they sand more smoothly and you can often skip using coarse grits altogether. To prevent cross-grain scratches, it’s important to sand in the wood grain direction.
The surface of the wood should be examined before sanding commences. A smooth wood surface with hardly any imperfections can be tackled with a medium followed by a fine grit sandpaper.
If the surface has old finishes, deep scratches, and a rough texture you will need to start with a coarse grit and move up gradually to finer grit sandpapers.
Sandpaper To Use According To Type Of Finish Being Used

A smooth surface is needed if you’re planning to paint the wood and this can be achieved with fine and extra fine grits.
If you want to apply a stain use a sandpaper that will prepare the surface to evenly accept the stain. An extra fine grit sandpaper can be used to refine and polish the surface to a very high standard.
If you’re unsure about which sandpaper grit to use, test it on an inconspicuous area or off-cut first. Some experimentation may be necessary, but eventually, you will find the ideal sandpaper grit for the task at hand.
It’s a great idea to have a wide variety of spare sandpaper in various grits on hand to make quick switches as necessary.
Sandpaper may come in sheets, discs for your power sander, rolls, special shapes, and other formats.
Make sure that the sandpaper you choose is compatible with hand or power sanders you’re planning to use.
Proper Sanding Technique To Use For The Best Results:
1/ Using the proper sanding technique is essential, always apply even pressure, work methodically, and choose the appropriate sandpaper grit for the task.
2/ Moving progressively from coarse to medium and finer grits is a great way to get professional looking results.
3/ After each sanding pass remove the dust and debris to keep the surface clean and reduce the risk of scratches.
4/ Always wear eye protection and a mask or respirator to keep airborne dust and debris out of your eyes and lungs.
5/ Consider adding a shop vac to your hobby shop or a dust extractor if you graduate to a full woodworking shop. This will help you to keep the workspace clean and healthier.
Wood Sanding Tips :In Conclusion
We trust that our Wood Sanding Tips will empower you to achieve professional-quality results in your upcoming projects. Before embarking on your sanding endeavor, it’s essential to evaluate the surface and define your desired outcome.
This thoughtful approach will guide you in selecting the appropriate sandpaper grit for your specific task. Remember, sanding demands a deliberate and patient touch; rushing through the process may lead to undesirable scratches, dents, or gouges in the wood.
In pursuit of flawlessly smooth surfaces, embrace the requirement for patience, for true perfection cannot be hurried.

I’m Thomas Steven with more than 12 years of experience in woodworking. It has always been my passion to become a successful woodworker. I have completed hundreds of successful projects. This blog is a way of sharing my woodworking experiences and what tools get the best results. I write about woodworking while being an associate with Amazon and I earn a little commission from every qualifying purchase.