The center of woodworking is cutting. It’s where the magic happens by sizing and shaping pieces of wood to create amazing stuff. Whether you are into basic carpentry or scroll sawing, there is a lot of cutting involved. That’s why every woodworker must master the different types of woodworking cuts and how to apply them.
While some like rip-cut are simple, others are complex like compound cuts. But the moment you master how to create these cuts, you will be unstoppable.
This article will take you through the different types of woodworking cuts and what saw to use when cutting.
Types of Woodworking Cuts
1. Rip-Cut
In woodworking, a rip cut is a cut that divides/cuts a piece of wood parallel to the grain.
First off, what does grain mean?
Inside a piece of wood, there are tightly packed fibers. These fibers run from the roots through the trunk to the top of the tree. They are like a bunch of straws tightly packed running from the bottom to the top.
The grain is what makes the tree grow straight without bending. The strength and stability of a piece of wood are defined by the grain.
A rip cut involves cutting a piece of wood parallel to the direction of the fiber or lengthwise. Or ripping a piece of wood apart.
Since you are not going against the wood grain, cutting a rip cut is easier. For instance, when cutting a piece of wood using an axe, cutting from the cross section is easier than cutting from the sides. When using an axe, the axe forces the fibers apart.
When cutting a board, a rip cut refers to cutting the board lengthwise. For instance, dividing an 8 x 4 board into two 2×8 boards
Saws for Cutting a Rip Cut Include
- Table saw
- Band saw
- Rip saw
- Circular saw
- Track saw
Saws made for rip cutting have rip blades with fewer teeth than a cross-cut blade and have larger gullets that make it easy to evacuate dust when cutting. Rip blades cut faster but produce a rough edge.
2. Cross-cut
A cross-cut is the opposite of a rip cut. It is cutting across the grain (side-to-side). It’s the most common cut in any workshop.

Since cross-cutting involves cutting across tightly packed fibers, cutting across a piece of wood or board is harder.
A cross-cut is done to reduce the length of a piece of wood. A rip cut reduces the length while keeping the width of the piece of wood or board intact.
Cross-cut blades have more teeth compared to rip-cut blades and have smaller gullets. The teeth are angled in an alternating pattern. This alternating design cuts the fiber like a knife edge.
Saws for Cross-Cutting Wood
- Miter saw
- Circular saw
- Table saw
- Thwart saw
- Crosscut saw
While these are the best types for making a cross-cut, you can make a cross-cut with almost any type of saw.
3. Miter Cut
A miter cut is any cut that is done at an angle other than 90 degrees using a miter cut. The most common miter cut is 45 degrees. A miter cut is done on two pieces of wood to form a miter joint.
A good example of a miter joint is the four corners of a picture frame. A perfect miter cut must be sharp and precise to form a perfect joint.
A miter cut is very similar to a bevel cut.
The Best Saws for Miter Cuts Are
- Miter saw
- Table saw
4. Bevel cut
A bevel cut is very similar to a miter cut. It’s any cut on the edge of a piece of wood or board at an angle other than 90 degrees. Just like bevel cuts are made to form a miter joint.
The only difference between a miter cut and a bevel cut is the placement of the wood on the saw when cutting. For a miter cut the piece of wood or board is placed on the face, while for a bevel cut the piece of wood is placed on the edge.
So, a miter cut is cut on the face of the wood or board while a bevel cut is cut on the edge.
Compared to other types of joints, the miter joint is not the strongest but it’s very eye-catching. They are commonly used in door moldings and windows.
5. Dado Cut
A dado cut is a three-dimensional cut that involves cutting a groove into a piece of wood or board where another piece of wood is connected. The length and width of the groove depend on the size of the resting wood.

A dado cut is cut across the grain, when it’s cut with the grain from end to end it’s called a groove cut.
A common use of a dado cut is when making bookshelves and cabinets. A dado cut is used to form interlocking joints for the shelves. In some places, a dado cut is also called a housing or trench.
Typically, the depth of the dado cut goes less than a third of the thickness of the piece of wood.
While there are different ways of cutting a dado, the most effective way to cut a dado is using a dado blade. You can also make a dado cut using a:
- Router
- Table saw
- Circular saw
- Chisel
6. Rabbet cut
Also referred to as rebate, a rabbet cut is a dado cut but with only one side. Unlike a dado which is cut a bit far from the end so that it has two sides, a rabbet cut is cut at the edge of the piece of wood. A rabbet cut looks like a staircase or step and forms a 90 degrees angle.
Just like a dado cut, a rabbet cut is used when joining two pieces of wood or boards forming a rabbet joint. And just like a dado cut, a rabbet cut is common in cabinetry and shelves construction.
A rabbet is cut with any of the following saws
- Table saw
- Router
- Dado blade
- Bit
Types of rabbet cuts
- A basic rabbet is when only one piece is cut, while the other one is not cut.
- A double rabbet is when a rabbet cut is cut on both pieces of wood that are to be connected. This joint is stronger than a basic rabbet.
- A mitered rabbet is when both the edges of the recess are mitered. This type of joint is very stylish and is commonly found on high-end pieces of furniture.
7. Groove cut
A groove cut is just like a dado cut. That’s why so many woodworkers refer to it as dado since they are basically the same.
Unlike a dado cut, a groove cut involves cutting a groove on a piece of wood along the grain. On the other hand, a dado cut is cutting a groove across the grain. Apart from the difference in direction, a groove cut is longer.
Also, unlike a dado cut which is mostly cut on the face, a groove is sometimes along the narrower surface of the piece of wood.
A groove cut is used to join two pieces of wood using glue and nails or screws.
Tools to cut a groove cut
- Router
- Table saw
- Circular saw
- Chisel
- Dremel
8. Relief Cut
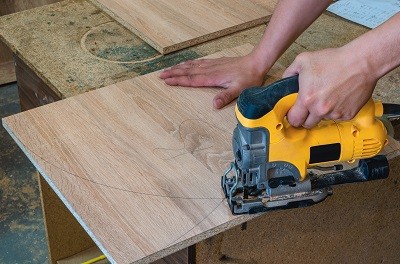
When cutting curves along the edges of a piece of wood you start by marking the shape of the curve. The next step is to remove all the materials that are outside the line you have drawn using a jigsaw. That’s where relief cuts come in.
Relief cuts are straight cuts that you make from the edge to the line you have drawn. These lines are cut parallel to each other and the length of each line depends on the shape you are cutting. The purpose of cutting these is that the unwanted materials will fall off as you cut. It’s like destructing the unwanted area.
This reduces the struggles of handling the long section of wood that you want to remove from the piece of wood that you are shaping.
High levels of accuracy are required when cutting relief cuts so that the cut extends exactly to the edge of shape so that the cut pieces fall off when they are cut.
9. Chamfer Cut
To explain a chamfer cut, I will use a 2×2 piece of wood. A 2×2 piece of wood has 4 sharp edges along the length. These corners form a 90-degree angle.
Now, a chamfer cut involves cutting one or more of the edges to remove the 90-degree sharp edge. However, you are only cutting the tip of the edge.
This makes a chamfer cut very similar to a bevel cut; the only difference is that a chamfer cut does not run across the face of the piece of wood.
A chamfer cut can be made using hand tools such as a plane or power tools such as a table saw.
A chamfer cut is made for decoration purposes and also helps in reducing damage to the piece of wood when the edges hit on something.
Types of chamfer cuts
- Plain chamfer
- Rounded chamfer
- Lamb’s tongue
10. Compound Cut – Compound Miter Cut
The compound cut is one of the most complicated types of cuts. This type of cut involves cutting a bevel cut and a miter cut on the same piece of wood using a miter saw. Compound cuts are common when making crown moldings and picture frames.
A good example of compound cuts is when making a wooden box with tilted sides. The sides of such a box are carefully angled and cut so that they can join perfectly.
Apart from using a miter saw you can also use a circular saw or a table saw to make a compound cut. There are different calculators to help you find the right bevel and miter angle depending on what you are making.
11. Plunge Cut
When doing any cut on a piece of wood, you will most probably start from the edge. The end makes a perfect place to start cutting using any type of saw. However, sometimes you need to make a cut in the middle of a board or piece of wood without cutting the sides. That’s what we call a plunge cut.

It’s a type of cut that starts in the middle of a piece of wood. An example of a plunge cut is when you want to cut a circle or any other shape from a piece of board.
However, not every saw can make a plunge cut. A plunge cut saw cuts the board from any spot on the surface. After setting and marking where you are cutting, you just hold the saw stationary and press it down for the saw to cut into the piece of wood.
You can make a plunge cut using
- Plunge saw
- A jigsaw
- A track saw
12. Resawing
Resawing is another type of woodworking cut that is very similar to a rip cut. It involves cutting a piece of wood along the grain to reduce the thickness. Resawing maintains the length and the width of the piece of wood to produce thinner pieces of wood or board
Type of saws for resawing
- Band saw
- Table saw
13. Curves and shapes
The last type of cut is shapes. Here it involves cutting different types of shapes from a piece of wood or board. There is no limit on the shape or design.
Saws for cutting shapes
- Jig saw
- Scroll saw
- Coping saw
- Fret saw
Wrapping up–Types of Woodworking Cuts
At the center of any woodworking project is a lot of cutting. Cutting makes it simple to connect pieces of wood. It also helps to prepare the pieces of wood in the required sizes, depending on the project at hand. There are more than ten types of woodworking cuts, with the cross-cut being the most common in any workshop. The above post shows you the different types of woodworking cuts, how they differ, and the type of saw to use for each cut.

I’m Thomas Steven with more than 12 years of experience in woodworking. It has always been my passion to become a successful woodworker. I have completed hundreds of successful projects. This blog is a way of sharing my woodworking experiences and what tools get the best results. I write about woodworking while being an associate with Amazon and I earn a little commission from every qualifying purchase.