If your floors are looking old and tired, it may be possible to revive them to bring back some style. Sanding oak floors can seem like a daunting task and it’s easy to make a mistake if you’ve never sanded before. But it is possible to get great results when you refinish red oak floors if you can follow the advice in our guide.
How Much Time Do I Need to Sand and Refinish My Oak Floors?
This process should take 3-5 days when you use an oil based polyurethane stain. But there may be some variation depending on the humidity, the darkness of the stain and the number of coats applied.
What Types of Sanders Are Best for Sanding Oak Floors?
There three types of sanders that can be used when you’re sanding oak floors:
1. The Drum Floor Sander
This is a large and heavy belt sander that is operated in the standing position. This sander has a main body with a drum where the sanding paper belts are attached and a large dust bag on the side.
This sander rips off any stains, high and bad spots, paint drips and other deeper stains that may be present on the floor. The wood floor can be taken right down to the bare wood, but the operator must be careful.
A drum floor sander can carve deep and permanent grooves into the floor if it’s used incorrectly. This is the first sander that should be used when sanding floors and it’s a large piece of equipment.
In fact, most drum floor sanders require two people to lift it and the machine will be rented. Most rental companies will recommend that you use a coarse grit to start, then medium grit and fine grit to prepare for the next sanding stage.
2. The Orbital Vibrating Floor Sander

This sander is also operated in a standing position, but the sanding head doesn’t rotate, it vibrates in circles to sand the surfaces. This sander is used to smooth the wood and it works well on solid hardwood, engineered wood, wood composition, and cork a parquet floors.
It is an excellent sander to take the flooring down to a smooth finish. The configuration is like the drum sander, but this sander is lighter and easier to maneuver. The danger of floor damage is reduced when the orbital vibrating floor sander is compared to the drum floor sander.
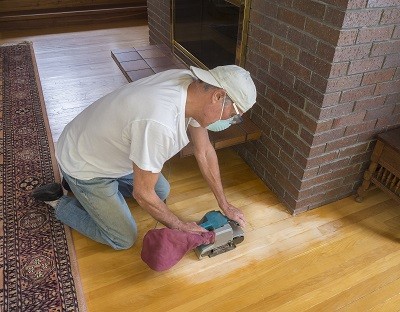
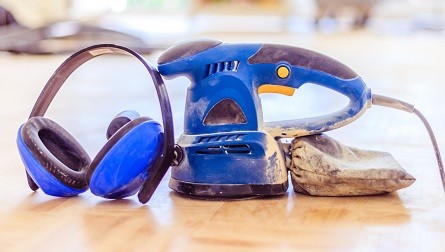
3. The Edge Floor Sander
This is a smaller hand-held sander that’s used to sand those hard to access areas that the other two sanders cannot reach. This tool has a dust bag, it can be rented from many locations and it’s more powerful than the dual-action sanders that many people may own. For this reason, it’s a better idea to rent an edge floor sander to avoid struggling with a DA sander.
What Equipment Do I Need to Have Before Getting Started Sanding Oak Floors
When you’re refinishing red oak floors you will need the following tools and supplies:
- Pliers
- Knives
- A pry bar
- A vacuum
- A floor sander (see above)
- Protective sheets
- Goggles and gloves
- Stain applicators
- New oil-based stain color
- Sandpapers
- Paint rollers
How Do You Sand and Refinish Oak Floors?
When you’re ready to start sanding oak floors follow these five steps in order:
Step 1: Before starting the Sanding Oak Floors Pick the Design and Color
You need to know how you want your floor to look before you start any sanding. These decisions may be affected by several unique factors, including: the existing decor, personal preferences, adjoining flooring and more.
Always use a high-quality stain to replace the old and worn-out colors. There may be unique application instructions to follow, and these should be considered carefully at this stage.
Step 2: Clean the Floor before Sanding Oak Floors
There are hardwood cleaning products specifically designed for these types of floors. When these floors are cleaned properly, there is still a need for refinishing, but this can happen less frequently. If you clean hardwood floors without specially formulated products, it can degrade the quality of the floor and more frequent refinishing is necessary.
Even if your hardwood floor is properly cleaned, it should be cleaned again before a refinish is applied. If you don’t have a hardwood cleaner, you can clean the floor with a water and vinegar solution. But the flooring must be fully dry and clean before the refinishing begins.
Step 3: Repairs
The hardwood floors must be in good shape before you start refinishing and the tools you need will vary depending on the extent and type of damage. If you’re a DIY enthusiast, you may already have the tools to fix minor holes and cracks in the flooring. But, if the damage is extensive, it may be necessary to remove sections of the floor and trowel filler may be needed.
Major damage can be repaired with a large knife and an appropriate filler, but it must be fully dry and sanded before refinishing begins. If you’re not confident with tools, it’s a better idea to hire a specialist to fix the floor and carry out the refinishing for you.
Step 4: Sanding Oak Floors
Sanding is necessary to ensure that the color and thickness of the hardwood flooring is uniform and level. Without sanding, the refinishing would look terrible, there would be patches and gaps which would ruin any aesthetic appeal. Sanding is difficult.
Never Used a Sander Before
If you’ve never sanded on such a large scale, it can be daunting. But if you take your time it can be a satisfying experience because the results are rewarding. When wood is sanded, the purpose is to remove existing paint and make the surface smooth for a new finish. This process can be manual, or a powered sander is used and for such a large project the latter is the only viable approach.
As you sand with the machine, you will push it to refinish the major areas of the flooring. These large sanding machines cannot reach into tight spaces and corners. So, you may need to use an edge floor sander or even sand manually in those areas.
Best Sander to Use
The drum floor sander is a daunting machine because it’s powerful and aggressive. Although it is the first machine used by professionals, it may be too complex for first time users. For this reason, many people skip to the orbital vibrating floor sander instead. This is an effective machine, it’s easier to control and if used properly it will refinish an oak floor.
To refinish an oak floor, you will need a variety of sandpapers for your chosen sander. They should have a grit of 35 or 36 for the best results and the main floor areas are where you need to start. It’s important to work in a pattern, move the sander over an area and avoid staying in one place too long.
The sanding action should be smooth and steady, don’t move too fast or you may miss areas. In the corners and along the edges you can sand manually or use the aforementioned edge floor sander. The thickness of the floor should be as even as possible and multiple passes may be needed to reach this stage.
You May also Like: 6 Best Sanders For Removing Paint From Wood & Deck
Step 5: Cleaning the Floor
When the sanding is completed, you will have a messy room that needs to be cleaned. The dust bag on the sander will collect a lot of dust, but a cleanup will still be necessary before you can continue.
Start with sweeping, then vacuum until there are no particles left on the floor. Again, this may take multiple passes, but a cleaner floor is easier to stain, and the results will be worth the extra effort. When you’re done, it’s time to buff and glaze the hardwood floor until it looks smooth and then it should be left to dry.
FAQ’s-Your Guide to Sanding Oak Floors
Can oak floors be refinished?
Yes, the process can be completed in a few hours and it’s less expensive than sanding to bare wood.
Can you sand oak flooring?
Yes, older oak flooring can be sanded to remove a dirty and worn-out finish and new floors are sanded to ensure that they are level.
How many times can you sand an oak floor?
This is determined by the quality and strength of the hardwood flooring. Some floors can be sanded up to five times and solid hardwood can be sanded ten times. An engineered hardwood floor is less resilient, and it can be sanded up to five times before replacement is needed.
What is the best time of year to refinish hardwood floors?
Spring or fall, because the external and indoor temperatures are more consistent. These seasons are also better for opening windows which can make airing out rooms and removing the odors a faster process. But if you are committed to sanding and refinishing a hardwood floor the task can be undertaken at any time.
Should I strip or sand hardwood floors?
This is hard to answer, there are pros and cons to consider, and these should be applied to your own unique circumstances. Like many other home improvement tasks, it’s important to match the requirements of the job to the correct approach.
As an example: if your wooden floor is painted, you will find that stripping is a more effective technique. But, if you need to remove a polyurethane finish when it’s older, you should be sanding the floors. If you are unsure about proceeding, it’s a great idea to get some professional advice before you commit to stripping or sanding.
Can I use a belt sander on hardwood floors?
Yes, a hand-held belt sander will level the floor in preparation for finer sanding later. This can be a laborious process, but it can be effective if your patient.
Can you sand hardwood floors against the grain?
No, when you sand across the wood grain, you’re tearing the wood fibers, and this wears out the surface quickly. When you sand with the grain, the surface is smoother, and the micro-structure of the wood fibers is not compromised.
Conclusion-Your Guide to Sanding Oak Floors
As you can see, sanding oak floors is a complex process, but if you’re prepared, this task can be completed in a few hours. The drum floor sander may be too hard to handle for most people. But you can get excellent results with a vibrating floor sander and edge floor sander if you’re using the right sandpaper grit.
Always choose a high-quality stain for your hardwood floor because it will look better, and it will offer superior protection. The key to success is a methodical approach and if you’re not confident with tools or any aspect of refinishing red oak floors, it’s better to call a professional.

I’m Thomas Steven with more than 12 years of experience in woodworking. It has always been my passion to become a successful woodworker. I have completed hundreds of successful projects. This blog is a way of sharing my woodworking experiences and what tools get the best results. I write about woodworking while being an associate with Amazon and I earn a little commission from every qualifying purchase.