An orbital sander is a powerful and diverse tool that can take a lot of heavy work out of a DIY project. But it’s important to learn how to use an orbital sander properly to get the best out of this tool. Understanding how an orbital sander works will help you to choose the right model to meet your needs and the accessories that you may need.
In this article, we will take a closer look at orbital sanders and explore how to use an orbital sander to help you make informed decisions.
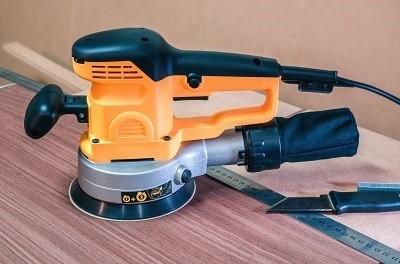
What Is An Orbital Sander?
Before we learn how to use a random orbital sander, it’s a good idea to explain what this tool is designed for.
The source of the name is the orbital shape of the sanding discs used with this power tool.
There are many different makes, models, and sizes on the market, but they are all designed to sand surfaces without making abrasions, marks, and scratches on the material. An orbital sander may be powered from the mains (direct current), but there are battery powered models and even air-powered tools.
All orbital sanders have the sanding disc rotation in common. The disc will rotate in an orbital motion along the axis, it spins on a ball-bearing and there is a slight jitter from side-to-side. This creates an elliptical sanding movement with some randomness which limits the potential for accidental damage to the sanded surface.
Step By Step: How To Use An Orbital Sander
When you’re learning how to use an orbital sander, there are five steps to follow:
Step #1. Choose the Correct Sanding Disc
A random orbital sander uses sanding discs of various grits to achieve the desired results. The sanding disc is usually stuck to a sanding pad; the disc may have a peel-and-stick pad on the back for this purpose. Some sanding discs have an alternate hook-and-loop back that attaches to the sanding pad instead.
When you fit a sanding disc, make sure that it’s the correct grit for the job at hand.
Let’s take a look at some guidelines to get you started:
● 20-36 Grit: This is considered to be coarse, use this grit range to strip paint, stain, and as the initial pass to remove a very rough surface.
● 40-60 Grit: This is a medium grit, use it for light stripping and/or coarse finishing. For most projects, this grit range would be used at the halfway point between coarse and fine sanding disc grits.
● 150-180 Grit: Use this sanding disc grit range to make the surface smooth for finishing.
Step #2. Secure the Material That you are going to sand

Before you can use an orbital sander or any power tool on a work-piece, it’s important to secure it in place. The material should be placed on a worktable, workbench, or workhorse and prevented from moving with clamps. It’s advisable to attach a vacuum to the orbital sander to collect the sawdust if it has a vacuum port.
If you have a shop vac on-hand, this can be used instead. Improving visibility and reducing the mess as you work will help you to be more productive, and the results will be improved.
Step #3. Start Sanding with your Orbital Sander
Supply power to the orbital sander with a fresh battery or a mains power source and you’re ready to get started. But, it’s a great idea to test the sander on a test piece of wood to ensure that the sander is set up properly. The sander removes layers of wood with rotational force, and it’s important to keep the orbital sander moving to avoid over sanding.
This is especially noticeable when you’re learning how to use an orbital floor sander. Make smooth passes in a back and forth motion, and if you’re sanding furniture, follow the grain to improve the finish.
Interesting Reading: Your Guide to Sanding Oak Floors
For the best results, keep the area clean and tidy as you work and maintain a firm grip on the orbital sander. Switch to different sanding disc grits as needed to successively sand the surface to a very smooth finish.
Step #4. Use Steady Sanding Movements
An orbital sander is designed for smooth sanding, and it lacks the raw power of a belt sander. But, it is still possible to gouge a surface with a random orbital sander if you keep the sanding disc in the same area for too long.
Continuous sanding movement is the key to success, and on flat surfaces, it’s important to follow the wood grain. Don’t lift the sander when you’re working, or you may create uneven marks and divots in the wood. Sand the center first and move to the edges last for the best results.
Many woodworkers use a technique known as “grain popping” to open up the grain for a stain or paint. This is a simple technique, take a warm and damp cloth and wipe it over the sanded surface.
Step #5. Clean Up after Finishing Sanding
When you’re finished, set the sander aside and use the vacuum or shop vac to remove the excess sawdust. Take a moment to check the work piece surface to ensure that you’re satisfied with the sanding results. Remove the power and clean the orbital sander before you put it away, and it will be ready when you need it for your next project.
What Speed Should I Run My Orbital Sander?
A random orbital sander is designed for slow and steady passes. The ideal speed for the best results is around an inch per second, and this feels very slow for some people. But, it’s important to remember that the random oscillators that drive the sanding discs need time to work properly.
What Is To Be Avoided While Sanding?

The sanding pad moves in two ways; it rotates, and it wiggles tightly in an orbital pattern at the same time. These combined movements create a random scratch pattern that runs in multiple directions, intersecting and overlapping.
This may sound terrible, but these marks are virtually invisible if the orbital sander is used properly. But, you can get visible scratches and spiral swirls if you’re sanding in the wrong way.
These are less noticeable on raw wood, but after a coat of stain, they are obvious.
Following the random orbital sanding advice in this article is the best way to avoid creating scratches.
What Are The Five Most Common Mistakes People Make With A Random Orbital Sander?
1. Sanding Too Quickly
Using an orbital sander must be slow and natural to avoid the creation of obvious swirls and scratches. Exceeding the 1” per second speed limit will degrade the sanding results. To practice working at this pace, use a timer or stopwatch as you’re working.
2. Pressing Too Hard on the Orbital Sander
The weight of your hands, arms, and the random orbital sander will provide sufficient pressure for effective sanding. There is no need to push down on the orbital sander to remove the wood layers, and it is a counterproductive action. When you press too hard, you’re preventing the sanding pad rotation, and this will produce scratches and swirls.
3. Purchasing Cheap Sanding Discs
Cheap sanding discs may have oversized particles that can cut deeply into the wood, which creates visible scratches on the surface. The best sanding discs have uniform grit particle sizes, which reduces the chance of scratching, and they tend to last longer too.
4. Placing the Sander After Starting
A random orbital sander needs to be placed in position before you turn it on. If you try to position the sander after it’s running, it may dig into the surface of the wood, causing dents and deep scratches.
You can lift the sander as it’s running, but it should be turned off before you set it down again.
5. Not Overlapping Sanding Passes
Across a larger flat surface, it’s important to overlap the sanding pass by around 50% where possible. The entire surface should be sanded with successively smooth grits to get the best results possible.
How to Use an Orbital Sander-FAQ’s
How do I know when I’ve sanded enough?
Scribble a pencil line on the surface of the wood and start sanding. When the pencil line has fully disappeared, move on to the next grit and repeat this process. When you’ve sanded to the highest grit, wet the wood with mineral spirits and check that no pencil marks remain.
Can I use an orbital sander on plywood?
Yes, but the same sanding rules apply. You can’t press down too hard because you can sand through plywood easily.
Why does my orbital sander jump?
If you’re sanding across a flat surface and you feel the tool pulling back and forwards, it’s time to replace the backup pad. If the orbital sander is bouncing as you’re sanding, this is a sure sign that the backup pad needs to be replaced.
How do I choose a sander speed?
Set the random orbital sanding speeds to match the grit of the sanding disc. Most models come with 6-speed settings, and the top speed is usually reserved for a 3,000 grit polishing disc. The full instructions for speed settings should be detailed in the owner’s manual for your orbital sander.
How long do orbital sander pads last?
The sanding disc should be replaced when it becomes too clogged to sand the material. If it’s taking too long to sand the area or you cannot sand without exerting extra pressure, it’s time to replace the disc. Change the backup pads every month if you’re using the orbital sander regularly. If you’re using the sander less, change the backup pad every three or six months as needed.
Can you use an orbital sander to refinish furniture?
The random oscillating sanding action of an orbital sander is ideally suited to flat surfaces. But you can use these tools on larger flat pieces of wood that are part of a piece of furniture or wood paneling, and there are larger variants for wood floors too.
Conclusion: How to Use an Orbital Sander
Now that you have a better idea of how to use an orbital sander, it’s obvious that this tool takes time, patience, and practice to use properly. If you master how to use an orbital sander, you can smooth a surface to a very high standard for finishing. To get the best results, remember to work slowly and methodically and overlap during each sanding pass.

I’m Thomas Steven with more than 12 years of experience in woodworking. It has always been my passion to become a successful woodworker. I have completed hundreds of successful projects. This blog is a way of sharing my woodworking experiences and what tools get the best results. I write about woodworking while being an associate with Amazon and I earn a little commission from every qualifying purchase.