Making mistakes is inevitable in woodworking, but they are an essential part of the learning process. This is especially true when we consider the application of wood stains. Some common wood stain mistakes include undesirable color choices, unwanted streaks, blotchy staining, and more.
Some stain finishes are designed for easier application, and this can reduce the risk of blotching if you wipe as you apply. When you’re applying a shellac finish to plywood, it’s important to work fast to prevent streaks.
This is because shellac dries quickly; in a warm room, it can be set in minutes, and this means that proper application techniques should be followed carefully. But, if you have made wood stain mistakes, here are seven ways to fix the problem.
7 Ways How To Fix Wood Stain Mistakes
1. Applying Darker Wood Stains
If you’re unhappy with a lighter wood stain that you’ve applied, the easiest fix is to add a coat of darker stain. The undercoat is not covered, so you will need to remove that before you apply the new darker stain.
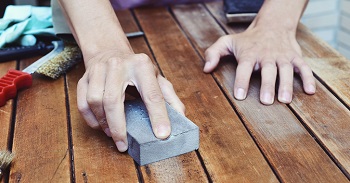
Simply sand the surface with fine-grit sandpaper and clean the surface thoroughly with a lint-free damp cloth. The surface must be naturally dry before you apply the new wood stain.
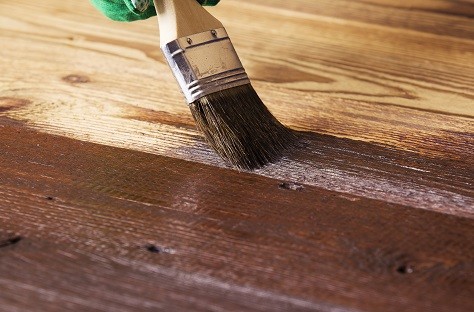
Apply the stain with a cloth or paintbrush with long strokes and give the stain sufficient time to fully dry before you apply the second coat. Apply additional coats of stain until you’re happy with the results, but most darker stains don’t need a third or even a second coat.
In many cases, a single application is all that you’ll need to get even coverage over a lighter-stained color. When you’re ready, apply a polyacrylic topcoat to protect the surface, and you’re done.
2. Whitewashing or Bleaching When a Wood Stain is Too Dark
If the wood stain is too dark, you can whitewash or bleach the surface to give the finish a lighter tone. This can be achieved with the application of A/B peroxide bleach or oxalic acid to whitewash the surface.
It’s important to note that household bleach does lighten wood, but it’s not as effective as the aforementioned options. It is possible to bleach any wood, but certain items of furniture may not respond well, and the color change may not be worth the extra effort.
To bleach wood, start by wiping the surface with the mineral spirit or clean water using a lint-free cloth. Leave the surface to dry fully for 1-2 days, and then apply the bleach evenly with a paintbrush or cloth, wearing rubber gloves to protect your hands.
Wipe away excess bleach with a cloth to prevent bleachy patches on the wood. The wood needs at least 4 hours to fully dry, and it should be neutralized with a cloth soaked with a 50-50 ratio of white vinegar and clean water.
Then dry the surface with a lint-free dry cloth followed by light, even sanding with 120-grit sandpaper. Always work in a well-ventilated space, and wear long sleeves, rubber gloves, and eye protection to stay safe.
3. Painting After Making a Wood Stain Mistake

When they’re learning how to fix wood stain mistakes, most people quickly switch to painting. This can be a good approach, but removing a stain with a chemical stripper before paint is applied is the best option.
That said, it is possible to paint over stained wood with no stripping if you scuff sand the surface. This will remove cracks, flakes, scratches, and chips and make the surface rougher to take the paint.
If you’re painting over a wood stain, sand the surface with 150-grit sandpaper or use an orbital sander with the equivalent sanding disc. Clean the wood surface with a lint-free damp cloth and allow it to dry fully.
Then apply an oil-based primer or shellac with a roller or foam brush and give the surface plenty of time to dry. When you’re ready to paint, choose an oil-based or latex paint and apply the first coat. For each additional coat, it’s important to lightly sand the surface in between coats to make the surface silky smooth.
When you’re satisfied, apply a final polyacrylic protective finish, and you’re done. If you’ve used a high-quality primer, you may be able to skip the scuff sanding stage. But, this can cause paint chips on wooden furniture and other items that are frequently used.
4. Remove and Reapply the Wood Stain
One of the more obvious ways to fix wood stain mistakes is to remove the stain and reapply it. A chemical stripper is required to remove the specific stain product, such as an interior wood stain remover.
There are some DIY approaches, but care should be exercised because they can be ineffective, and may even damage the wood. Some examples include vinegar, bleach, acetone, and nail polish remover.
To remove the stain, start by preparing the area with a dust sheet or some plastic wrap to protect the floor. Then test the stripper on an unobtrusive area of the wood to ensure that it works as intended. If you’re satisfied with the stripping results, pour the product on the wood and spread it evenly using a paintbrush.
The recommended waiting time for stripping products is in the 20-30 minute range, and this should be clearly shown on the label. When the time has elapsed, scrape the stain off the surface with a putty knife and clean the area with a damp cloth.
When the surface is fully dry, apply the fresh stain with a natural bristle brush and follow the direction of the grain closely. Any excess stain should be wiped away with a clean lint-free cloth, and the surface should be allowed to dry.
In most cases, a second coat of stain isn’t necessary because you can leave a stain on the wood for a longer time before wiping it to make the coat darker. To protect the surface, apply a polyurethane varnish after a 3-12 hour drying time.
5. Dilute the Wood Stain
If the wood stain is still wet and you want it to be lighter in tone and more evenly applied, there is a fix if you act quickly. Applying a wood conditioner within 15 minutes can dilute the stain and improve the results.
If the stain is too dark or it’s blotchy, the same principle can apply in reverse if you flood the surface with a solvent to make the stain thinner. This approach will only work if the wood stain is wet, and there is no effect if it’s attempted on dried stains.
A typical oil-based wood stain can be thinned with mineral spirits. If you’ve used a water-based stain, you can use water to achieve the same results. Apply the solvent to the stain with a clean rag and scrub the surface firmly as you work.
This applies the solvent evenly, and it lifts the stain particles from the surface. The results may not be even, and the stain will lighten, but some areas may soak up more solvent than others. The key factor is the wood you’re working with and how it reacts with the mineral spirits.
6. Removing Splotchy Marks
Certain tree species have rich pockets of sap that affect the even distribution of wood stains. To fix this problem, you can strip away the wood stain using the technique shown above and then seal the surface with an alcohol and de-waxed shellac mixture.
The surface of the wood should be saturated with the solution, and then the excess is wiped off. Leave the wood to dry for at least 2 hours and then switch to a 100% pigmented stain. Wipe frequently to even out any differences in color, and the splotchy marks should be virtually unnoticeable.
7. Use a Tinted Polyurethane Product
If you have the wrong color stain, leave the wood to dry naturally and then apply a tinted polyurethane finish. This can dramatically change the color tone to balance the color that you have with the color that you actually want. But, this can only work if you’re prepared to go darker and this approach will not make the stain tone lighter.
Wood Stain Mistakes In Conclusion
Many wood stain mistakes can be avoided if you apply the stain carefully following the product instructions. Using a stain-able wood putty is essential if you need to fill any surface imperfections before you stain the wood.
Now you know how to fix wood stain mistakes, you’ll appreciate it is possible to apply fresh stain over the existing stain, but this will always make the color tone darker. Adjusting the stain to fix any mistakes is easier and faster than stain removal and re-staining.
You should only need one or two coats of wood stain to get even coverage. If you leave the wood stains on the surface for longer, it will make the final color darker.

I’m Thomas Steven with more than 12 years of experience in woodworking. It has always been my passion to become a successful woodworker. I have completed hundreds of successful projects. This blog is a way of sharing my woodworking experiences and what tools get the best results. I write about woodworking while being an associate with Amazon and I earn a little commission from every qualifying purchase.