After a hardwood floor installation, most people are looking for that finish that inspires awe in the beholder. This is achieved with a polyurethane coating that protects the wood from scratches, spills, and impacts that can damage them. When you’re researching How to Apply Polyurethane to Floors, you may notice that there are two main varieties and several sheen levels that vary from matte to glossy.
But, it’s important to understand that the application is not an easy process, and you will need to brush up on some essential skills to tackle this project successfully.
What Tools Will You Need to Apply Polyurethane to Floors?
To avoid searching for tools and materials that you will need after the project has started, assemble the following:
Tools to Get started:

- Vacuum machine
- Sander machine
- Paint the tray with liners
- A natural bristle brush
- Paintbrush
- Mixing stick
- Roller pad
- Painter’s tape
- Cutting pad
- Various sandpaper grits
- Steel wool
- Clean, lint-free cloths
- Breathing and synthetic protection
- A can or container
Products You Need before Applying Polyurethane to Floors:
- White vinegar
- Mineral spirits
- Polyurethane
- Water-based polyurethane
- Oil-based polyurethane
Polyurethane Choices
The polyurethane that you choose can be water-based if you have natural-colored floors or oil-based if you’ve used a stain or other finish. If you want to complete the application in one day, use a water-based polyurethane product.
Oil-based alternatives are less expensive, but they require more prep work, and they can dry with a “milky” finish. An oil-based polyurethane will add deeper tones to the existing floor color.
But, when you’re applying polyurethane to wood floors, it’s important to note that oil-based products take longer to dry, and they have a strong odor that lingers for a while.
How Do You Prep a Floor for Polyurethane?
Before you can begin applying polyurethane to floors, there is some important and tedious prep work. The hardwood floors must be vacuumed thoroughly to get a clean and dust-free surface to work on. Make sure you get into every corner and crevice to remove dust and cobwebs that may be lurking there. During this cleaning, it’s a good idea to open the windows to let some air into the room.
Next, you need to sand away the old finish. Start with the roughest sandpaper and graduate to smoother grits as you go. Don’t spend too long sanding in a single area to prevent scratching and scoring the wood. Check for splinters and dents, vacuum the floor again and wipe the boards with a lint-free cloth soaks with mineral spirits.
Always follow the instructions for the sanding machine carefully and look for online tutorials or videos that can help.
Steps for How to Apply Polyurethane to Floors
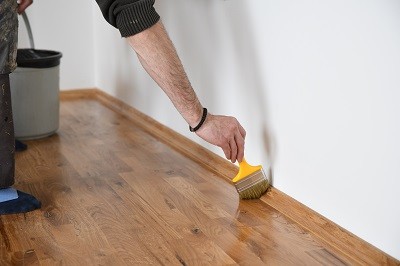
When you’re applying polyurethane to floors, it’s important to work slowly and methodically to get the best finish. Use a 3-5” brush to apply the polyurethane at the flooring edges and the roller/pad to apply it to the center of the floor.
Let’s look at the edge and center application stages in more detail:
9 Steps to How to Apply Polyurethane to Floors Edges With a Brush
- Remove the baseboard or cover it with painter’s tape.
- Stir the polyurethane slowly, don’t be tempted to shake it or whip it, or you may introduce air bubbles into the liquid.
- Start the application process at the point that’s furthest away from the door entryway into the room.
- Dip the brush in the polyurethane to cover up to ⅓ to ½ of the bristles.
- Clear the excess from the brush tip on the container edge.
- Work along the edge with 10-14” strokes and double back twice using a “Z” shaped pattern in tight movements.
- Each backstroke and second front stroke should overlap slightly.
- Repeat this for each edge section, overlap as you go, and work for around 8-10 minutes at a time.
- When the edges are done, turn your attention to the center of the room and alternate.
Five steps to apply the polyurethane to the center with the roller:
- Dip the pad or roller in the polyurethane to get an even coating.
- Start at the edge of the center and work the polyurethane out toward the edges, following the grain of the wood.
- Use back-and-forth sweeps of 3-4 feet.
- Alternate between the center and edges every 10-12 minutes to avoid drying where you left off.
- Add 1-2 extra coats and lightly sand in between with an abrasive pad for water-based and steel wool for oil-based polyurethane.
When you’re learning about applying polyurethane to floors, there are four simple tips that make the process easier:
- Look out for dripping and fix these spots before they can dry.
- The first coat should be completely dry before the process restarts.
- Always read the manufacturer’s recommendations for the polyurethane drying times carefully.
- When the floor is dry, you can wet sand any imperfections or drip marks that are obvious.
When you’re applying polyurethane to floors, there are three common mistakes to avoid:
1. An Uneven Finish
It’s important to get an even finish if you want that wow factor when people see the finished floor. There are several causes of uneven finishes, such as:
- Uneven polyurethane application
- Improperly sanded surfaces
- Dirty and dusty surfaces
- Contaminated polyurethane
- Insufficient mixing
If the finish is uneven, you need to sand the entire floor and start again.
2. Causes of Separating in the Finish
If the polyurethane coats are applied separately gradually, there are several possible causes, including:
- Insufficient mixing
- Contamination
- Improper surface cleaning
- Oily wood surfaces
- Applied layers being too thick
- The polyurethane has expired
The only way to correct this problem is through sanding and the application of fresh coats of polyurethane.
3. A Streaked Finish
This is caused by brush marks; they appear when the polyurethane finish has dried before the marks are gone. The rapid gloss levels across the surface can make some areas glossier than others. This is a more common mistake when water-based polyurethane is used on the floors.
There are several possible causes:
- Excessive brush movements
- Improper mixing
- The edge is not wet
- The spread is not uniform
This problem can be fixed if you screen the surface and then re-coat it with a fresh layer of polyurethane. Sand the surface before you apply each layer using fine (220 grit) sandpaper.
If you’re more experienced at finishing wood, you can add another coat of polyurethane in areas where you can see that the gloss levels are low. At these points, fill the brush streaks carefully, wait until they are dry, sand lightly and reapply the polyurethane.
How To Care For A Floor That Has Been Finished With Polyurethane

Gentle sweeping, dust mopping, vacuuming (with no beater bar), and damp mopping will keep the floor clean without adding too much moisture. Add a few drops of dish detergent to the water and run the slightly damp mop over the floor.
Follow up with a microfiber mop to dry the surface, and avoid using a steam cleaner unless they have a polyurethane finish setting. If you want to steam clean, do it infrequently and take extra care.
How to Apply Polyurethane to Floors-FAQ’s
How do you prevent polyurethane from brush marks?
Polyurethane can be applied with a brush, roller, or even spraying. A brush application can have an even finish, but its use should be restricted to areas less than 150 square feet. Applying with rollers is easier on smooth surfaces, and spraying is harder, but it can reach hard-to-access corners.
How many coats of poly does a floor need?
Three coats of polyurethane are optimal; the floor needs to dry between applications and lightly sanded. Certain finishers recommend two coats, but the floor has less protection, and scratches may penetrate the surface. You can save time and money by applying two coats, but you may need to refinish the floor earlier than expected.
Do you buff a floor after polyurethane?
Buffing is optional, but few people can resist this stage to get their hardwood floors shining after cleaning.
What are the disadvantages of using polyurethane?
Polyurethane finishes can’t be re-coated without sanding, and repairs can be difficult.
Why do you not shake polyurethane?
Shaking can trap air in the polyurethane, which causes bubbles to form in the layer that you apply to the floor. Stirring will ensure that the polyurethane has an even composition, and there will be no air bubbles to ruin the finish.
What happens if you put polyurethane on too thick?
Thick coats will lengthen the drying times and increase the risk of air bubble formation. Thin coats of polyurethane are always a better option.
How to Apply Polyurethane to Floors-In Conclusion:
When you’re learning about applying polyurethane to floors, it will quickly become apparent that this is hard work. It is possible to make the process easier with good preparation, and practicing your technique on pieces of scrap wood is advisable.
The most important thing to remember is that you should never walk or sand floors that are not dry. If you take your time and maintain your hardwood floor regularly, it should look beautiful for many years.

I’m Thomas Steven with more than 12 years of experience in woodworking. It has always been my passion to become a successful woodworker. I have completed hundreds of successful projects. This blog is a way of sharing my woodworking experiences and what tools get the best results. I write about woodworking while being an associate with Amazon and I earn a little commission from every qualifying purchase.